How to Install MailBud-E Mail Alert
Installing MailBud-E is quick and easy. Most people can install it in just a few minutes.
What You Need
- MailBud-E Mail Alert
- Small Battery Drill with 1/8" drill bit for the eye screw & 1/4" for the bolt (recommended)
Installation Steps
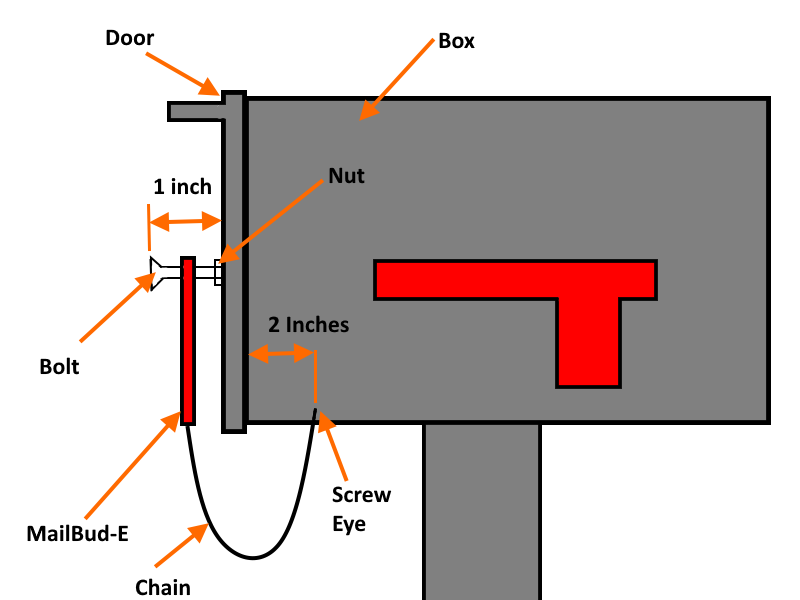
- Drill a hole on either the right or left side of the mailbox, on the bottom, about 2 inches back from the front and 3/8 inch up from the bottom.(for concrete use a Masonary bit, and drill the hole alongside of the mail box approx. 2" to the right or left whichever side you choose.)
- While holding the MailBud-E and chain, screw the eye screw into the 1/8" hole. Tighten securely, but do not over tighten.
- Allow the MailBud-E to hang freely so the chain can unwind naturally.
- Place the MailBud-E on the mailbox door and use it as a template. Place the MailBud-E on the front of the door and inside the edges. Do not let it hang down under or off the side to avoid wind blowing it off. (view photo)
- Drill a 1/4" hole through the door using the MailBud-E as your guide.
- Remove the wing nut from the bolt and insert the bolt through the 1/4" hole from the front of the door. Reattach the wing nut and tighten by hand securely!
- Place the MailBud-E onto the bolt. Open the mailbox door and allow the MailBud-E to fall off. Repeat this a few times to confirm proper operation.
Watch the MailBud-e Mail Alert Installation Video
Installation Images & Photos
Best to keep the MailBud-E Mail Alert on the front face of the mail box door as much as passible to keep the wind from blowing it off. It can be placed on either the right or left side of the door - your preference.

Installing the Bolt
The bolt can be adjusted in or out to ensure the MailBud-E Mail Alert stays in place during windy conditions and drops correctly when the door is opened.